
Our Method
Looking Back: Traditional Orthotic Methods
Historically, foot orthotics were prescribed through visual assessment, aiming to position the foot in a subtalar joint neutral alignment.
Modern biomechanics has revealed the critical role of forces and the subtalar joint axis. A medially positioned axis creates a longer lever arm, generating greater pronation force compared to a lateral axis. This increases tissue stress and the likelihood of injury for patients.
A Scientific Way To Prescribe Orthotics
The foot naturally cycles through pronation and supination during movement. The force exerted on tissues during pronation is heavily influenced by the subtalar joint’s position. Greater forces demand more robust orthotic support, but the goal is always to provide the least amount necessary to alleviate symptoms. Using the Keystone device, you can measure these forces and, with your clinical expertise, determine the ideal rearfoot wedge, arch height, and material stiffness to create a custom orthotic that perfectly matches your patient’s needs.
-
Pronation
If the pronation force is too great injury occurs. This is often the case with a medial subtalar joint axis. Effective orthotics resist the force of pronation
-
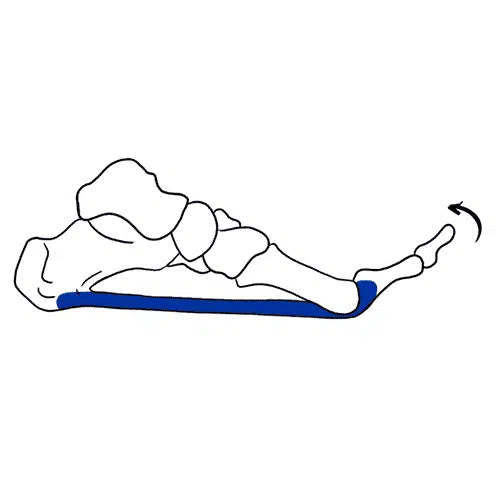
Supination
Enabling the 1st Ray to plantar flex stabilizes propulsion. Effective orthotics assist the 1st Ray to plantar flex.


-
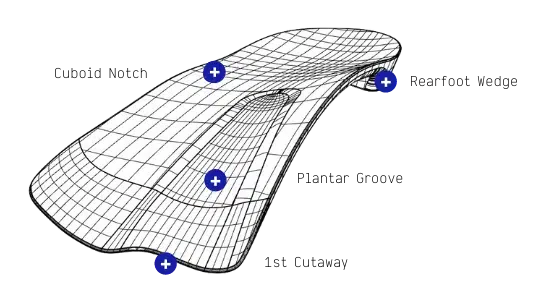
Features that assist supination
-
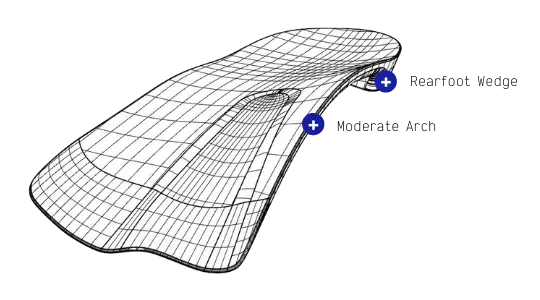
Features that resist pronation


STEP 1
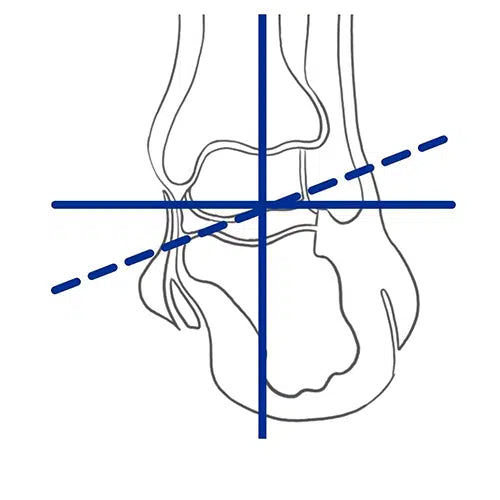
CHECK Subtalar Axis Position
The SubTjt axis position gives an indication of what to expect from the Keystone measurement.
- Patient prone
- Start medial, progress laterally pushing thumb into heel
- At a certain point the heel will not rotate medially or laterally
- Mark this point with a pen as it is on the SubTjt Axis
- Repeat this process at the forefoot, over the Met Heads
- Join the two points together, this line represents the SubTjt axis
A medial axis produces high forces and results in a high Keystone reading compared to a lateral axis which will give a low reading.

STEP 2
DETERMINE Support with Keystone
The Keystone measures the force needed to supinate the foot and is indicative of the force of pronation. The result can be used to deterine how much support the patient needs from their orthotics.
Low keystone reading [less than 100 Newtons]
Options such as low arch height, low material stiffness and less rearfoot wedging.
Moderate keystone reading [100-200 Newtons]
Options such as moderate arch height – material stiffness – and rearfoot wedging.
High keystone reading [200+ Newtons]
Options such as high arch height – material stiffness and increased rearfoot wedging.

STEP 3
CHECK Comfort and Fit
Orthotic fit to the foot
- The front edge of the orthotic shell should end just proximal to the Met Heads
Orthotic fit to the shoe
- A 3/4 length orthotic can be placed under the existing show insole, or on top of the insole – depending on the patients comfort.
- If the orthotic is full lenght remove any existing insoles before fitting in the shoe.
- The orthotic should feel comfortable in the shoe

STEP 4
REVIEW 1 - 2 Weeks
- The reveiw is to check comfort and compliance.
- If symptoms continue and the orthotic is comfortable consider increasing the orthotic support as well as addressing any other factors.
- The short or long term use of the orthotic is an individual patient decision depending on the symptoms.